Financing Available: 0% interest, 36 months. With approved credit

Learn More
954-715-4995

Category Archives: Uncategorized

Air Conditioner Wind Control

Why Are Some Rooms In My House Hotter or Colder Than Others?

Maintaining a consistent temperature throughout your home is crucial for comfort and energy efficiency. However, it’s not uncommon to find that some rooms in your house are hotter or colder than others. This issue can be frustrating and uncomfortable, especially during extreme weather conditions. We will explore the common causes of temperature imbalances in your home and provide practical solutions to help you achieve a more even and comfortable indoor climate.

Common Causes of Temperature Imbalances

1. Poor Insulation

Insulation plays a critical role in maintaining a consistent temperature in your home. Poor or inadequate insulation can lead to significant temperature differences between rooms. If certain areas of your home are not properly insulated, they may be more susceptible to temperature fluctuations.

Solution:

  • Upgrade Insulation: Ensure that your home is properly insulated, including walls, attics, and crawl spaces. Consider using high-quality insulation materials to improve thermal efficiency.
  • Seal Gaps and Cracks: Inspect your home for gaps, cracks, and leaks around windows, doors, and other openings. Sealing these areas can prevent drafts and improve temperature consistency.

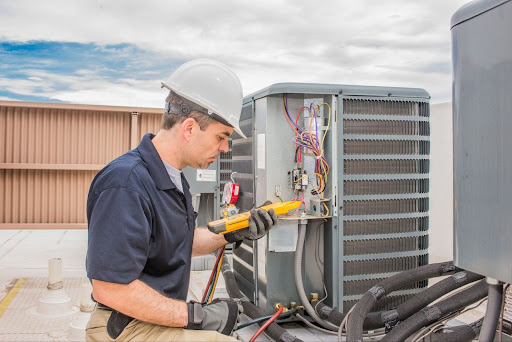
2. Inadequate HVAC System

An HVAC system that is not properly sized for your home can result in uneven heating and cooling. If your system is too small, it may struggle to maintain the desired temperature in all rooms. Conversely, an oversized system can short-cycle, leading to inconsistent temperatures.

Solution:

  • Proper Sizing: Consult with an HVAC professional to ensure that your system is correctly sized for your home. They can perform a load calculation to determine the appropriate capacity for your HVAC system.
  • Regular Maintenance: Schedule regular maintenance for your HVAC system to ensure it is operating efficiently. This includes cleaning or replacing filters, checking ductwork, and inspecting the system for any issues.

3. Blocked or Leaky Ductwork

Ductwork is responsible for distributing heated or cooled air throughout your home. If there are blockages, leaks, or poorly designed ductwork, certain rooms may not receive adequate airflow, leading to temperature imbalances.

Solution:

  • Inspect Ductwork: Have your ductwork inspected by a professional to identify and repair any leaks or blockages. This can significantly improve airflow and temperature consistency.
  • Proper Design: Ensure that your ductwork is properly designed and installed to deliver air evenly throughout your home. This may involve adjusting or adding ducts to optimize airflow.

4. Sunlight and Window Exposure

Rooms with large windows or those that receive direct sunlight can become significantly warmer than other areas of your home. Conversely, rooms with little to no sunlight exposure can feel colder.

Solution:

  • Window Treatments: Use blinds, curtains, or shades to block excessive sunlight during the hottest parts of the day. This can help reduce heat buildup in sun-exposed rooms.
  • Window Upgrades: Consider upgrading to energy-efficient windows that provide better insulation and reduce heat transfer.

5. Room Usage and Occupancy

The way you use different rooms and the number of occupants can impact the temperature. For example, a home office with multiple electronic devices can generate more heat, while an unoccupied guest room may feel colder.

Solution:

  • Zoning Systems: Implement a zoning system that allows you to control the temperature of different areas of your home independently. This can help maintain comfort in frequently used rooms without wasting energy on unused spaces.
  • Adjust Thermostat Settings: Adjust the thermostat settings based on room usage and occupancy. For example, lower the temperature in unoccupied rooms and increase it in areas with high activity.

6. Vent and Register Issues

Blocked or closed vents and registers can restrict airflow to certain rooms, leading to temperature differences. It’s important to ensure that all vents and registers are open and unobstructed.

Solution:

  • Check Vents and Registers: Regularly inspect all vents and registers to ensure they are open and not blocked by furniture, rugs, or other items. Proper airflow is essential for maintaining consistent temperatures.
  • Use Vent Deflectors: Install vent deflectors to direct airflow more effectively, especially in rooms with uneven distribution.

7. Thermostat Placement

The location of your thermostat can influence how your HVAC system responds to temperature changes. If the thermostat is placed in an area with extreme temperatures, it may not accurately reflect the overall temperature of your home.

Solution:

  • Optimal Placement: Ensure that your thermostat is placed in a central location, away from direct sunlight, drafts, and heat sources. This allows for a more accurate reading of your home’s temperature.
  • Smart Thermostats: Consider upgrading to a smart thermostat that can monitor multiple areas of your home and adjust the temperature accordingly.

Practical Solutions for a Balanced Indoor Climate

Practical Solutions for a Balanced Indoor Climate

  • Conduct an Energy Audit

An energy audit can help identify areas of your home that contribute to temperature imbalances. A professional energy auditor can assess insulation levels, ductwork, and other factors that affect your home’s thermal efficiency.

  • Implement Zoning Systems

Zoning systems allow you to control the temperature of different areas of your home independently. This can be particularly useful for homes with multiple levels or large floor plans. By dividing your home into zones, you can ensure that each area receives the appropriate amount of heating or cooling.

  • Use Ceiling Fans

Ceiling fans can help circulate air and improve temperature distribution in your home. During the summer, set ceiling fans to rotate counterclockwise to create a cooling breeze. In the winter, set them to rotate clockwise to push warm air down from the ceiling.

  • Upgrade to a Variable-Speed HVAC System

Variable-speed HVAC systems can adjust their output based on the heating and cooling needs of your home. Unlike single-speed systems that operate at full capacity, variable-speed systems provide more precise temperature control and better airflow distribution.

  • Insulate and Seal Ductwork

Properly insulated and sealed ductwork is essential for maintaining consistent temperatures throughout your home. Insulation prevents heat loss or gains as air travels through the ducts while sealing prevents leaks that can reduce airflow.

  • Optimize Ventilation

Proper ventilation can improve indoor air quality and help maintain a consistent temperature. Ensure that your home’s ventilation system is balanced and that exhaust fans in kitchens and bathrooms are functioning correctly.

  • Install Programmable or Smart Thermostats

Programmable and smart thermostats offer advanced features that can help maintain a balanced indoor climate. These thermostats can adjust your schedule and adjust the temperature based on occupancy, ensuring optimal comfort and energy efficiency.

  • Address Structural Issues

In some cases, structural issues such as uneven floors, poorly designed layouts, or inadequate insulation in certain areas can contribute to temperature imbalances. Addressing these issues may require renovations or modifications to improve overall thermal efficiency.

Achieving Consistent Comfort Throughout Your Home

Temperature imbalances in your home can be caused by a variety of factors, including poor insulation, inadequate HVAC systems, blocked or leaky ductwork, sunlight exposure, room usage, vent issues, and thermostat placement. By understanding these common causes and implementing practical solutions, you can achieve a more consistent and comfortable indoor climate.

Regular maintenance, proper insulation, and the use of advanced HVAC technologies can help ensure that every room in your home remains at a comfortable temperature. If you’re experiencing persistent temperature imbalances, consider consulting with a professional AC technician or conducting an energy audit to identify and address the underlying issues.

For professional AC services and advice, contact Natal Air Conditioning USA. Our experienced technicians can help diagnose and resolve temperature imbalances, ensuring your home remains comfortable year-round.

My Home Air Conditioner Leaking Water Inside

Why Is My Home Air Conditioner Leaking Water Inside?

Air conditioning is essential, especially during the sweltering summer months. However, it can be distressing to find water leaking inside your home from your air conditioner. Understanding the causes of this issue and knowing how to address them can prevent further damage and ensure your AC runs efficiently.


How and Why Water Forms in Your Air Conditioner

  • The Cooling Process
    Modern air conditioning systems generally consist of two main components: an indoor unit and an outdoor unit. The indoor unit contains an evaporator coil, which cools warm air as it passes over the coil. This process is similar to how water droplets form on the outside of a cold glass of water on a hot day. As warm air contacts the cold evaporator coil, condensation forms.
  • Condensate Drainage
    The condensation that forms on the evaporator coil drips into a condensate pan. From there, the water is routed outside your home or into an interior drain via a PVC drain line. This system works efficiently under normal conditions, but various issues can cause water to leak inside your home.


Common Causes of a Leaking Air Conditioner

1. Clogged Condensate Drain Line

One of the most common causes of water leaking from your AC unit is a clogged condensate drain line. Over time, the drain line can become clogged with dirt, dust, algae, and other debris. When this happens, water backs up and overflows from the drain pan, causing leaks inside your home.

Solution:

  • DIY Fix: Use a wet/dry vacuum to remove the clog from the condensate line.
  • Professional Help: If DIY methods don’t work, contact a professional HVAC technician who can use specialized tools to clear the blockage.

2. Damaged or Rusted Drain Pan

If your air conditioning system is older (typically 12-15 years), the drain pan may be damaged or rusted through. This damage allows water to fall right through the pan and leak into your home.

Solution:

  • Replace the damaged or rusted drain pan with a new one.

3. Broken Condensate Pump

In homes where the air conditioning unit is installed in the basement, a condensate pump is used to pump water outside. If this pump breaks, water is no longer pumped outside and will leak into your home instead.

Solution:

  • Repair or replace the broken condensate pump.

4. Dirty Air Filter

A dirty air filter can block airflow over the evaporator coil, causing the coil to freeze. When the ice on the coil melts, the resulting water can overflow the drain pan.

Solution:

  • Check and replace the air filter regularly, ideally every 1-3 months, depending on usage and season.

5. Low Refrigerant Levels

Low refrigerant levels cause the evaporator coil to become excessively cold, leading to freezing. When the frozen coil thaws, it can cause an overflow in the drain pan.

Signs of Low Refrigerant:

  • The air conditioner isn’t cooling effectively.
  • You hear a hissing or bubbling noise, indicating a refrigerant leak.

Solution:

  • Have a qualified HVAC technician inspect the system and refill the refrigerant. They will also repair any leaks.

6. Frozen Evaporator Coils

Frozen evaporator coils are typically caused by restricted airflow, low refrigerant levels, or dirty coils. When the ice melts, it can quickly fill the drain pan and cause leaks.

Solution:

  • Regularly maintain your AC unit to keep coils clean and ensure adequate airflow. Monitor refrigerant levels and have any issues addressed promptly.

7. Improper AC Installation

An improperly installed air conditioning unit or a poorly configured condensate drain line can lead to drainage problems and water leaks.

Solution:

  • Ensure your air conditioning unit is installed and maintained by a qualified professional.

Preventive Measures

Regular Maintenance

Regular maintenance is key to preventing many of the issues that cause water leaks. Schedule annual maintenance with a professional HVAC technician to inspect and clean your system, check refrigerant levels, and ensure all components are in good working order.

Install a Float Switch

Consider installing a float switch in your air conditioning unit. This switch will automatically shut down the system if the water level in the drain pan gets too high, preventing overflow and potential water damage.

Monitor and Replace Air Filters

Regularly check and replace air filters to ensure adequate airflow over the evaporator coil. This simple step can prevent many of the issues that lead to water leaks.


When to Call a Professional

When to Call an Air Conditioner Professional

While some minor issues can be handled with DIY methods, it’s important to know when to call a professional. If you’ve tried basic troubleshooting steps like changing the air filter and unclogging the drain line without success, it’s time to seek professional help. Ignoring persistent issues can lead to more serious damage and costly repairs down the line.

Choosing the Right HVAC Technician

When selecting an HVAC technician, look for:

  • Experience and Certification: Ensure they are licensed and have experience with your type of AC unit.
  • Reputation: Check reviews and ask for recommendations from friends and family.
  • Service Area: Confirm that they service your area and can respond promptly to emergencies. 

Additional Considerations

Impact of Humidity on AC Leaks

High humidity levels can exacerbate AC leaks. The more humid the air, the more condensation forms on the evaporator coil. This can overwhelm the drain pan and lead to leaks, especially if the system is not functioning optimally.

Managing Humidity:

  • Use a dehumidifier to reduce indoor humidity levels.
  • Ensure your AC unit is appropriately sized for your home. An undersized unit will struggle to dehumidify the air effectively, while an oversized unit may short-cycle, leading to insufficient dehumidification.

The Role of Insulation

Proper insulation around your air conditioning system can prevent condensation from forming on the outside of the unit and dripping into your home. This is especially important in humid climates.

Insulating Your AC System:

  • Wrap the refrigerant lines with insulation to prevent condensation.
  • Ensure the area around the air handler is well-insulated to reduce temperature differentials that can cause condensation.

Seasonal Inspections

Conducting seasonal inspections can help identify potential problems before they become serious. In addition to annual maintenance, consider having your system checked at the start of each cooling season.

What to Inspect:

  • Check for any signs of wear and tear on components.
  • Ensure the drain line is clear and the drain pan is intact.
  • Verify that refrigerant levels are adequate and there are no leaks. 

The Importance of Addressing a Leaking Air Conditioner

A leaking air conditioner can cause significant water damage and lead to increased energy bills if left unaddressed. By understanding the common causes of water leaks and taking preventive measures, you can keep your AC unit running efficiently and your home dry. Regular maintenance and timely professional intervention are key to preventing and addressing leaks effectively.

For professional AC repair and maintenance, contact your trusted local HVAC service provider. They can diagnose and fix the problem, ensuring your home remains cool and comfortable throughout the summer months.

Practical Steps to Take

  1. Turn Off the AC:
    • The first step if you notice water leaking from your air conditioner is to turn off the system. This prevents further water damage and allows you to inspect the unit safely.
  2. Check the Air Filter:
    • Remove the air filter and inspect it for dirt and debris. If it appears dirty, replace it with a new filter. Regularly changing the air filter can prevent many common AC issues.
  3. Inspect the Drain Line:
    • Locate the condensate drain line and check for any visible blockages. Use a wet/dry vacuum to clear any clogs. If this doesn’t resolve the issue, a professional technician can use specialized tools to clear the line.
  4. Examine the Drain Pan:
    • Look for signs of rust or damage in the drain pan. If you notice any issues, replace the drain pan to prevent water from leaking into your home.
  5. Monitor Refrigerant Levels:
    • Low refrigerant levels can cause the evaporator coil to freeze. If you suspect a refrigerant issue, contact a professional technician to inspect and refill the refrigerant.
  6. Clean the Coils:
    • Dirty evaporator coils can cause the system to freeze and leak water. Schedule regular maintenance to have the coils cleaned and ensure optimal airflow.
  7. Check the Installation:
    • Improper installation can lead to drainage problems. Ensure your AC unit is installed by a qualified professional to prevent leaks and other issues.

Long-Term Solutions

Investing in regular maintenance and addressing issues promptly can save you money in the long run by preventing costly repairs and extending the life of your air conditioning unit. Here are some long-term solutions to consider:

  1. Annual Maintenance Contracts:
    • Many HVAC companies offer annual maintenance contracts that include regular inspections, cleaning, and servicing of your air conditioning system. This proactive approach ensures your system is always in top condition.
  2. Upgrade to a New System:
    • If your air conditioning unit is older and experiencing frequent issues, it might be time to consider upgrading to a newer, more efficient model. Modern AC units are designed to be more energy-efficient and less prone to common problems like leaks.
  3. Install a Smart Thermostat:
    • A smart thermostat can help you monitor and control your air conditioning system more effectively. These devices can alert you to potential issues and allow you to adjust settings remotely, ensuring your home remains comfortable and your system operates efficiently.

By following these steps and investing in regular maintenance, you can ensure your air conditioning system operates smoothly, keeping your home cool and dry throughout the year. Remember, when in doubt, always seek professional help to diagnose and fix any issues with your AC unit—call (954) 787-5339 to get a free consultation.

What To Do When Your A:C Making Weird Noises

What To Do When Your A/C Making Weird Noises?

Your air conditioner is a crucial part of maintaining comfort in your home, especially during the hot summer months. When it starts making unusual noises, it can be both alarming and frustrating. The type of noise your air conditioner is making can indicate different problems that require specific actions. In this comprehensive guide, we will explore various types of noises your A/C might make and what they mean, along with the steps you can take to address these issues.

Common A/C Noises and Their Meanings

1. Banging or Rattling

Possible Cause: Loose Parts

Description: Banging or rattling sounds often indicate that there are loose parts within the air conditioner. These parts can include fan blades, motor mounts, or compressor components.

What to Do:

  • Inspect Visually: If you feel comfortable and have the right tools, turn off the power to your A/C and check for any visibly loose parts.
  • Tighten Loose Parts: If you identify any loose components, you can try tightening them carefully. Ensure the power is off to avoid any accidents.
  • Call a Professional: If you are unable to find the source of the noise or are unsure about how to fix it, it is best to call a professional HVAC technician. They can thoroughly inspect the unit and secure or replace any loose parts as needed.

2. Buzzing, Vibrating, or Popping

Possible Cause: Electrical Issues

Description: Buzzing, vibrating, or popping noises can be signs of electrical issues within the A/C unit. These issues could be related to the circuit breaker, fan motor, or internal wiring.

What to Do:

  • Turn Off the A/C: Immediately turn off your air conditioner to prevent any potential electrical hazards.
  • Check Circuit Breaker: Look at your circuit breaker panel to see if any breakers have tripped. Resetting a tripped breaker might solve the problem temporarily.
  • Call a Professional: Electrical problems can be dangerous and should be handled by a qualified HVAC technician. They can diagnose the issue, check the wiring and components, and make necessary repairs safely.

3. Hissing

Possible Cause: Refrigerant Leak

Description: A hissing noise often indicates a refrigerant leak. Refrigerant is vital for the cooling process, and a leak can severely impact your A/C’s performance.

What to Do:

  • Turn Off the A/C: To prevent further damage to the system, turn off the air conditioner.
  • Call a Professional Immediately: Refrigerant leaks can be harmful to the environment and your health. An HVAC professional will locate the leak, repair it, and recharge the refrigerant to the correct levels.

4. Cracking or Popping

Possible Cause: Icing on the Coils

Description: Cracking or popping noises might mean that your air conditioner is icing up, which can happen when there is restricted airflow or low refrigerant levels.

What to Do:

  • Turn Off the A/C: Switch off the unit to allow the ice to melt.
  • Set Thermostat Warmer: Set your thermostat to a warmer temperature and let the system defrost.
  • Check Air Filters: Ensure your air filters are clean and replace them if necessary to improve airflow.
  • Call a Professional: If the problem persists, an HVAC technician can check for deeper issues such as refrigerant levels or blockages in the system.

5. Other Noises

Possible Cause: Various Issues

Description: Air conditioners can make a variety of other noises, each indicating different issues. Here are some examples:

  • Grinding or Screeching: These noises often signal a problem with the compressor or condenser fan. They might be due to worn-out bearings or other mechanical failures.
  • Whistling: A whistling noise can indicate a ductwork issue, such as a leak or a blockage.
  • Gurgling or Bubbling: These sounds typically mean there is a clogged air conditioner drain line, which can cause water to back up and affect the system.

What to Do:

  • Grinding or Screeching: Turn off the A/C and call a professional immediately. Running the unit with these noises can cause further damage.
  • Whistling: Check your ductwork for visible leaks or obstructions. Sealing duct leaks can often be done with duct tape or mastic sealant, but major issues will require professional assistance.
  • Gurgling or Bubbling: Turn off the unit and check the drain line for blockages. You can attempt to clear minor clogs with a wet/dry vacuum, but persistent issues should be addressed by an HVAC technician.

Preventative Maintenance Tips

Preventative Maintenance Tips

To avoid these issues and keep your air conditioner running smoothly, regular maintenance is key. Here are some tips to help maintain your A/C unit:

1. Schedule Annual Professional Maintenance

Having a professional HVAC technician inspect and service your air conditioner annually can catch potential problems early and keep your system running efficiently.

2. Replace Air Filters Regularly

Dirty air filters can restrict airflow, causing the system to work harder and potentially leading to issues such as icing on the coils. Replace your air filters every 1-3 months, depending on usage and the type of filter.

3. Keep the Outdoor Unit Clean

Ensure the area around your outdoor condenser unit is clear of debris, plants, and other obstructions. Clean the coils and fins periodically to maintain optimal airflow.

4. Check and Clean the Drain Line

Regularly inspect and clean the drain line to prevent clogs that can lead to water damage and reduced efficiency.

5. Monitor Thermostat Settings

Keep an eye on your thermostat settings and ensure it is functioning correctly. Consider upgrading to a programmable or smart thermostat for better control and efficiency.

When to Call a Professional

While some minor maintenance tasks can be done by homeowners, certain situations require the expertise of a professional HVAC technician. Here are some scenarios where you should definitely call for professional help:

1. Persistent Noises

If your air conditioner continues to make unusual noises despite your efforts to address them, it’s time to call a professional. Persistent noises often indicate underlying issues that need expert attention.

2. Reduced Cooling Efficiency

If your A/C is struggling to cool your home effectively, there could be multiple issues at play, such as low refrigerant levels, dirty coils, or a failing compressor. A professional can diagnose and fix these problems.

3. Frequent Cycling

If your air conditioner is frequently turning on and off (short-cycling), it can indicate issues like an oversized unit, thermostat problems, or electrical issues. This not only reduces efficiency but also wears out the system faster.

4. High Energy Bills

Unusually high energy bills can be a sign that your air conditioner is not operating efficiently. Professional maintenance can help improve efficiency and reduce energy costs.

5. Water Leaks

If you notice water pooling around your indoor unit, it’s a sign of a clogged drain line or other issues. Ignoring water leaks can lead to significant water damage and mold growth.

The Importance of Addressing Weird A/C Noises and Seeking Professional Help

Weird noises from your air conditioner are not only annoying but can also indicate serious problems that need addressing. By understanding what different noises mean and taking appropriate actions, you can prevent minor issues from becoming major repairs. Regular maintenance and prompt professional help are crucial in keeping your A/C unit running efficiently and prolonging its lifespan.

At Natal Air Conditioning, our experienced technicians are ready to help you with all your air conditioning needs. Whether it’s diagnosing strange noises, performing routine maintenance, or repairing complex issues, we are just a call away. Contact us today to schedule an appointment and ensure your home stays comfortable and cool throughout the year.

10 Reasons Why Your Home AC Smells Weird

10 Reasons Why Your Home AC Smells Weird

Air conditioning is essential for maintaining comfort in your home, especially during the scorching summer months. However, there are times when your home AC might emit strange and unpleasant odors. These odors can be more than just an inconvenience—they can indicate underlying issues that need immediate attention. In this comprehensive guide, we will explore the top 10 reasons why your home AC smells weird and provide actionable steps to address these issues.

1. Mold and Mildew Growth

Why It Happens

One of the most common reasons for a musty or moldy smell coming from your air conditioner is the growth of mold and mildew. The AC unit, particularly the evaporator coils and drip pans, provides a damp environment that is conducive to mold growth.

Signs to Look For

  • Musty or earthy odors when the AC is running
  • Visible mold on the air filters, coils, or ductwork
  • Increased humidity levels in your home

How to Fix It

  • Clean or Replace Filters: Regularly clean or replace your air filters to prevent mold spores from circulating.
  • Professional Cleaning: Hire a professional to clean the evaporator coils and other internal components.
  • Ensure Proper Drainage: Make sure the condensate drain line is not clogged and is draining properly.

2. Dirty or Clogged Air Filters

Why It Happens

Air filters trap dust, dirt, and other airborne particles. Over time, these filters can become clogged, leading to reduced airflow and a build-up of trapped particles that can produce a foul smell.

Signs to Look For

  • A dusty or stale smell when the AC is on
  • Reduced airflow from the vents
  • Increased dust accumulation in your home

How to Fix It

  • Regular Maintenance: Replace air filters every 1-3 months, depending on usage and filter type.
  • High-Quality Filters: Use high-efficiency particulate air (HEPA) filters to trap more particles.

3. Dead Animals

Why It Happens

Small animals and insects can find their way into the ductwork or the AC unit itself. If these animals die inside the system, their decomposing bodies can produce a strong, unpleasant odor.

Signs to Look For

  • A strong, foul odor resembling rotting meat
  • Increased presence of flies or other insects around the vents
  • Unusual noises from the ductwork or unit

How to Fix It

  • Professional Inspection: Have a professional inspect the ductwork and unit to remove any dead animals.
  • Seal Entry Points: Ensure all potential entry points for animals are sealed to prevent future occurrences.

4. Electrical Problems

Why It Happens

An electrical burning smell can indicate issues such as overheating components, frayed wiring, or other electrical problems within the AC unit.

Signs to Look For

  • A burning or metallic smell
  • Frequent tripping of circuit breakers
  • Unusual sounds like buzzing or humming from the unit

How to Fix It

  • Turn Off the AC: Immediately turn off the unit to prevent potential fire hazards.
  • Professional Repair: Contact a certified HVAC technician to inspect and repair any electrical issues.

10 Reasons Why Your Home AC Smell Weird

5. Gas Leaks

Why It Happens

Although less common, a chemical smell can sometimes be due to a refrigerant leak or other gas leaks within the system. Refrigerants have a distinct, often sweet smell.

Signs to Look For

  • A chemical or sweet odor
  • Decreased cooling efficiency
  • Ice build-up on the refrigerant lines

How to Fix It

  • Professional Diagnosis: Turn off the AC and call a professional to diagnose and repair any refrigerant leaks.
  • Regular Maintenance: Schedule annual maintenance to check for potential leaks.

6. Dirty Evaporator Coils

Why It Happens

The evaporator coils in your AC unit can accumulate dirt and debris over time. When these coils get dirty, they can emit a musty or dirty sock-like smell.

Signs to Look For

  • A musty or dirty sock smell when the AC is on
  • Reduced cooling efficiency
  • Increased humidity levels in your home

How to Fix It

  • Regular Cleaning: Clean the evaporator coils at least once a year.
  • Professional Service: Hire a professional for deep cleaning and maintenance.

7. Full Condensate Pan

Why It Happens

The condensate pan collects water that drips from the evaporator coils. If the pan is full or not draining properly, it can cause a musty odor.

Signs to Look For

  • A musty smell
  • Visible water in or around the AC unit
  • Mold growth near the condensate pan

How to Fix It

  • Empty the Pan: Regularly check and empty the condensate pan.
  • Clear the Drain Line: Ensure the drain line is not clogged and is functioning properly.

8. Cigarette Smoke

Why It Happens

If someone in your home smokes, the odor can be drawn into the AC system and redistributed throughout the house when the AC is running.

Signs to Look For

  • A lingering smell of cigarette smoke
  • Yellowish stains on vents and filters
  • Smoky smell even when no one is smoking

How to Fix It

  • Air Purifiers: Use air purifiers to reduce smoke particles in the air.
  • Regular Cleaning: Clean or replace filters more frequently.
  • Designated Smoking Areas: Encourage smoking outside or in designated areas away from the AC intake.

9. Sewage Odors

Why It Happens

A sewage-like smell can indicate a problem with your plumbing system, such as a backed-up sewer line, that is causing gasses to be pulled into the AC system.

Signs to Look For

  • A foul, sewage-like odor
  • Gurgling sounds from plumbing fixtures
  • Visible signs of sewage backup

How to Fix It

  • Inspect Plumbing: Have a plumber inspect your sewage system for blockages or leaks.
  • Ventilation Check: Ensure proper ventilation of plumbing vents.

10. VOCs (Volatile Organic Compounds)

Why It Happens

Household products like paints, cleaning supplies, and new furniture can release volatile organic compounds (VOCs), which can be drawn into the AC system and cause a chemical-like smell.

Signs to Look For

  • A chemical or paint-like odor
  • Recent use of products containing VOCs
  • Headaches or dizziness when the smell is present

How to Fix It

  • Ventilate: Increase ventilation when using products that release VOCs.
  • Air Purifiers: Use air purifiers with activated carbon filters to reduce VOCs.
  • Limit Use: Minimize the use of high-VOC products indoors.

Preventative Measures to Avoid Weird AC Smells

To prevent unpleasant odors from developing in your air conditioning system, follow these preventative measures:

1. Regular Maintenance

Schedule regular maintenance with a professional HVAC technician. This includes cleaning the coils, checking the refrigerant levels, inspecting electrical components, and ensuring the system is running efficiently.

2. Replace Filters Regularly

Regularly replace or clean air filters to prevent dust and debris build-up. This not only helps in maintaining clean air but also improves the efficiency of your AC unit.

3. Keep the Area Clean

Ensure the area around your outdoor unit is free from debris, leaves, and other obstructions that could affect airflow and lead to mold growth or other issues.

4. Check for Leaks

Regularly check for any signs of leaks, whether it’s water from the condensate pan or refrigerant from the coils. Addressing leaks promptly can prevent mold growth and maintain system efficiency.

5. Use Dehumidifiers

In high-humidity areas, consider using dehumidifiers to reduce moisture levels. Lower humidity can prevent mold and mildew growth in and around your AC unit.

6. Seal Ductwork

Inspect your ductwork for any signs of leaks or damage. Sealing the ductwork can prevent outside contaminants from entering the system and causing odors.

7. Install Air Purifiers

Consider installing air purifiers with HEPA filters and activated carbon filters to reduce odors, allergens, and VOCs in your home.

8. Avoid High-VOC Products

Minimize the use of high-VOC products indoors. When necessary, ensure proper ventilation to reduce the concentration of VOCs in the air.

9. Keep Pets Clean

Regularly bathe and groom pets to reduce pet dander and odors that can be drawn into the AC system. Clean pet areas frequently to maintain a fresh indoor environment.

10. Monitor and Address Issues Promptly

Be vigilant about any changes in the performance or smell of your AC unit. Addressing issues promptly can prevent minor problems from becoming major repairs.

Addressing Weird AC Smells: The Importance of Timely Action and Professional Help

Weird smells coming from your home AC unit can be more than just a nuisance—they can signal underlying issues that need immediate attention. By understanding the common causes of these odors and taking the appropriate steps to address them, you can ensure that your air conditioning system remains efficient, effective, and odor-free.

Regular maintenance and prompt professional assistance are key to preventing and resolving these issues. At Natal Air Conditioning, our experienced technicians are ready to help you with all your air conditioning needs. From diagnosing strange smells to performing routine maintenance and complex repairs, we are just a call away. Contact us today to schedule an appointment and keep your home comfortable and fresh all year round.