If you rely on air conditioning to stay cool in the Florida heat, the AC compressor is doing more heavy lifting than you might realize. As the core of your HVAC system, the compressor is responsible for circulating refrigerant and enabling the cooling process that keeps your home comfortable. Without it, your air conditioner simply would not function.
In this guide, we will explain what the AC compressor does, how it works, where it fits into your system, and how to recognize when it may be having issues.
What Is an AC Compressor?
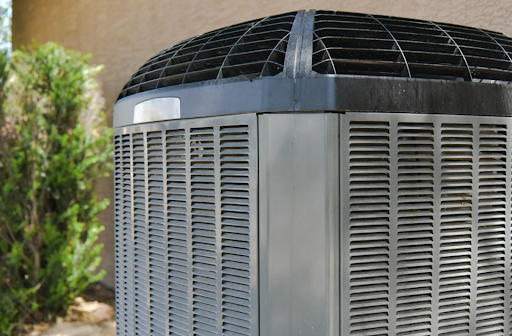
The AC compressor is a mechanical component located in the outdoor condenser unit. It serves as the engine of the air conditioning system, pressurizing and circulating refrigerant so that heat can be removed from inside your home and expelled outside.
By converting low-pressure refrigerant vapor into a high-pressure, high-temperature gas, the compressor enables the entire cooling cycle to operate efficiently. Whether you refer to it as an HVAC compressor, air conditioning compressor, or air conditioner compressor, this part is critical to the system’s performance.
How the AC Compressor Works
The cooling process in an air conditioner begins when warm indoor air passes over the evaporator coil. The refrigerant inside the coil absorbs the heat and evaporates into a low-pressure gas. This gas then travels to the compressor in the outdoor unit.
Once the refrigerant reaches the compressor, it is compressed into a high-pressure, high-temperature gas. This high-energy refrigerant then moves into the condenser coil, also located outdoors. Here, a fan blows outdoor air across the coil, allowing the refrigerant to release its heat and convert back into a liquid.
This cooled liquid refrigerant travels back to the indoor unit to repeat the cycle, absorbing more heat and continuing to cool your home.
Types of Compressors
There are several types of AC compressors, including:
- Scroll Compressors: Known for energy efficiency and quiet operation.
- Reciprocating Compressors: Use pistons to compress the refrigerant, similar to a car engine.
- Rotary Compressors: Compact and reliable, often used in smaller systems.
- Variable Speed Compressors: Adjust performance based on cooling demand, improving efficiency and comfort.
Each type has unique advantages, but they all perform the same basic function—moving refrigerant through the system to remove heat.
Signs Your AC Compressor May Be Failing
Because the AC compressor is such a vital component, problems with it can cause significant issues for your entire system. Here are some warning signs that your compressor may be malfunctioning:
Warm Air from the Vents
If your AC is running but the air coming out is not cool, the compressor may not be effectively circulating refrigerant.
Strange Noises
Grinding, clanking, or buzzing noises coming from the outdoor unit can indicate internal damage to the compressor or electrical issues.
Hard Starting or Short Cycling
If your AC takes a long time to start or cycles on and off frequently, the compressor may be struggling to maintain pressure.
Reduced Airflow
A failing compressor can result in weak airflow from your vents, even when the fan is working properly.
Tripped Breakers or Overheating
If your circuit breaker frequently trips while the AC is on, the compressor may be drawing too much power due to mechanical stress or failure.
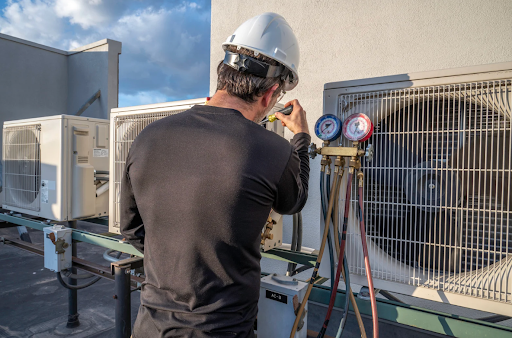
Schedule AC Compressor Inspection
Common Compressor Issues
Like any hardworking mechanical part, the AC compressor is subject to wear and tear. Some of the most common issues include:
- Electrical failures: Damaged wires, contactors, or relays can prevent the compressor from starting.
- Refrigerant leaks: Low refrigerant levels can cause the compressor to overheat and shut down.
- Overheating: Blocked airflow or dirty coils can trap heat and cause the compressor to overwork.
- Contamination: Dirt or moisture inside the system can damage internal parts and reduce efficiency.
How Long Does an AC Compressor Last?
With proper care and regular maintenance, an AC compressor can last between 10 and 15 years. However, heavy use, poor installation, or lack of maintenance can shorten its lifespan.
If your compressor fails prematurely, it is important to have a professional assess the system to determine whether repair or replacement is the most cost-effective solution.
Do You Have to Replace the Whole Unit?
Whether or not you need to replace the entire air conditioning system depends on several factors:
- Age of the system: If your AC is more than 10 years old, replacing the whole unit may be more economical.
- Warranty coverage: If your compressor is still under warranty, replacement may only involve labor costs.
- Overall condition: If other components are worn out, investing in a new system may provide better long-term value.
A qualified HVAC technician can help you weigh the pros and cons based on your specific situation.
Tips for Protecting Your Compressor
While compressor repairs should always be handled by professionals, there are a few things you can do as a homeowner to protect this critical component:
- Keep the outdoor unit clear of debris and vegetation.
- Schedule regular HVAC tune-ups to check refrigerant levels and electrical connections.
- Change air filters regularly to ensure good airflow.
- Use a programmable or smart thermostat to prevent excessive cycling.
Routine maintenance helps catch small issues before they turn into expensive problems and extends the life of your entire HVAC system.
Why the Compressor Matters
The compressor may not be the most visible part of your AC system, but it is certainly one of the most important. Without it, your air conditioner would not be able to cool your home. By understanding how the compressor works and taking proactive steps to care for it, you can improve efficiency, avoid breakdowns, and stay cool through the hottest months.
If you suspect something is wrong with your air conditioning compressor, Natal Air Conditioning is here to help. Our certified technicians can diagnose the issue and recommend the right solution to keep your system running at its best.